Working together
Create a role and set its identity and hierarchy
Use the role list and Identity tab to name a tafkid, describe it, and place it at the right leadership level.
At a glance
- 1From the shevet dashboard, open Manage Shevet, then choose Manage Shevet. Select Manage Roles to see this shevet's role templates.
- 2Choose New role to create a blank template, or use the copy button on an existing role when its permissions are a useful starting point. Creation and duplication add a separate role; they do not change the original.
- 3Open the role's card and choose Identity. Enter its English and Hebrew names and a short description so managers can recognize it when assigning members or invitations.
- 4Review Role order below the names. Levels run from higher leadership to lower leadership; roles in the same level share a rank. Drag only the current role into an existing level or between levels to create a new one.
- 5Check the position before saving: hierarchy affects which roles can be managed or assigned, not just how the list looks.
- 6Choose Save changes in the page header. The unsaved-changes indicator should clear. If validation fails, read the issue list above the active tab and correct it before trying again.
- 7Return to the role list to check the name and member-use count. To remove an unused role, use its delete button and confirm; use duplicate when you want a new role with similar settings.
Step-by-step walkthrough
1.Choose a role template to work on
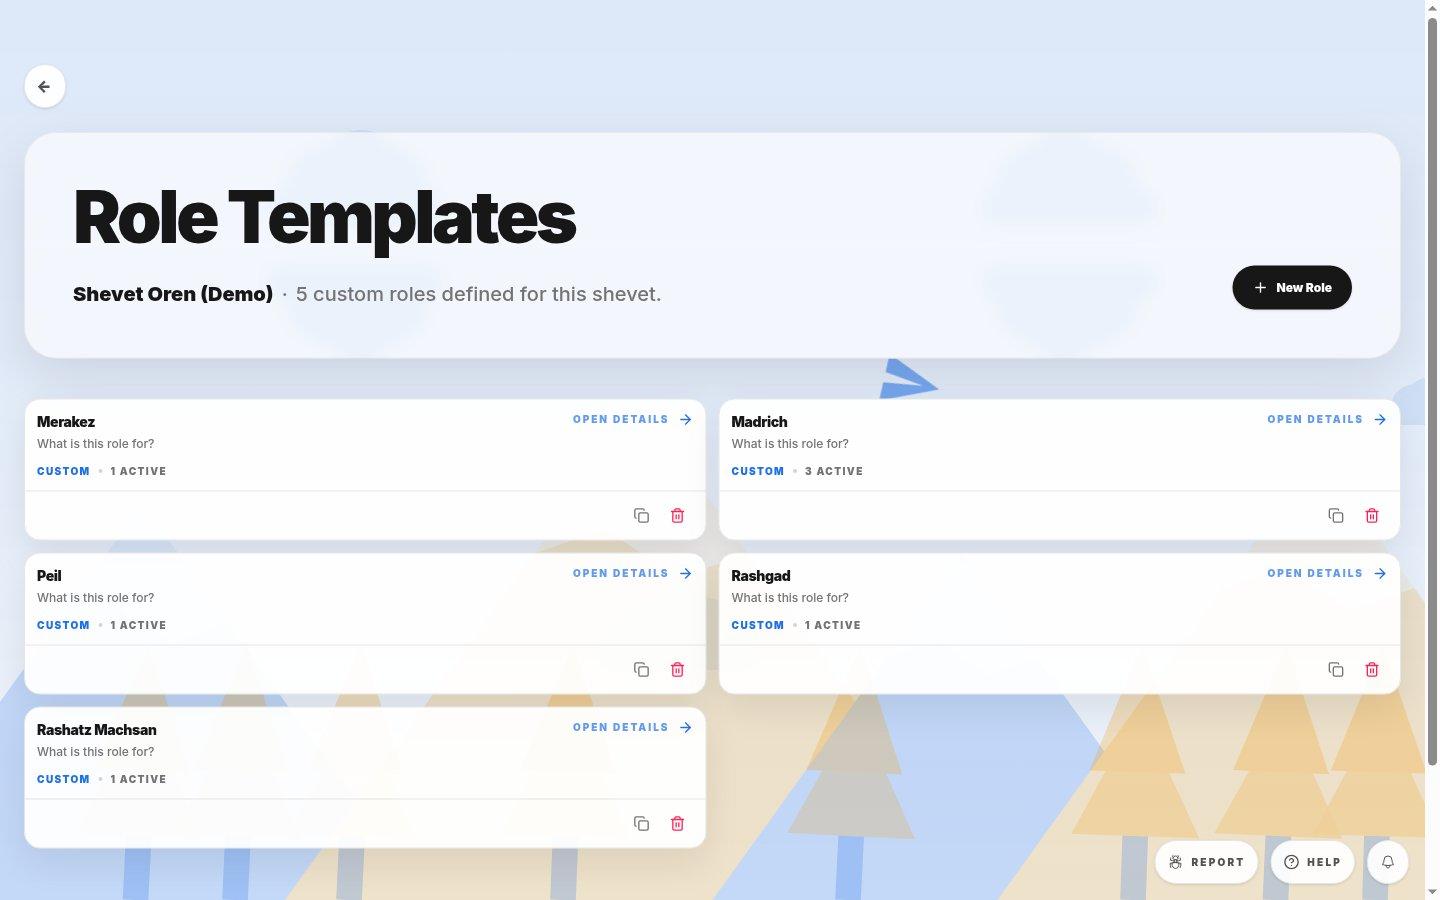
- New roleCreates a blank template without changing any existing role.
- Existing role cardOpen the card to edit that role, or duplicate it to use its settings as a starting point.
- 1From Manage Shevet, open Manage Roles.
- 2Decide whether to edit an existing role or create a separate one. Duplicating does not change the original.
2.Give the role a clear name and rank
Identity tells managers what the role is. The hierarchy also affects which roles this one can manage or assign; it is not just a display order.
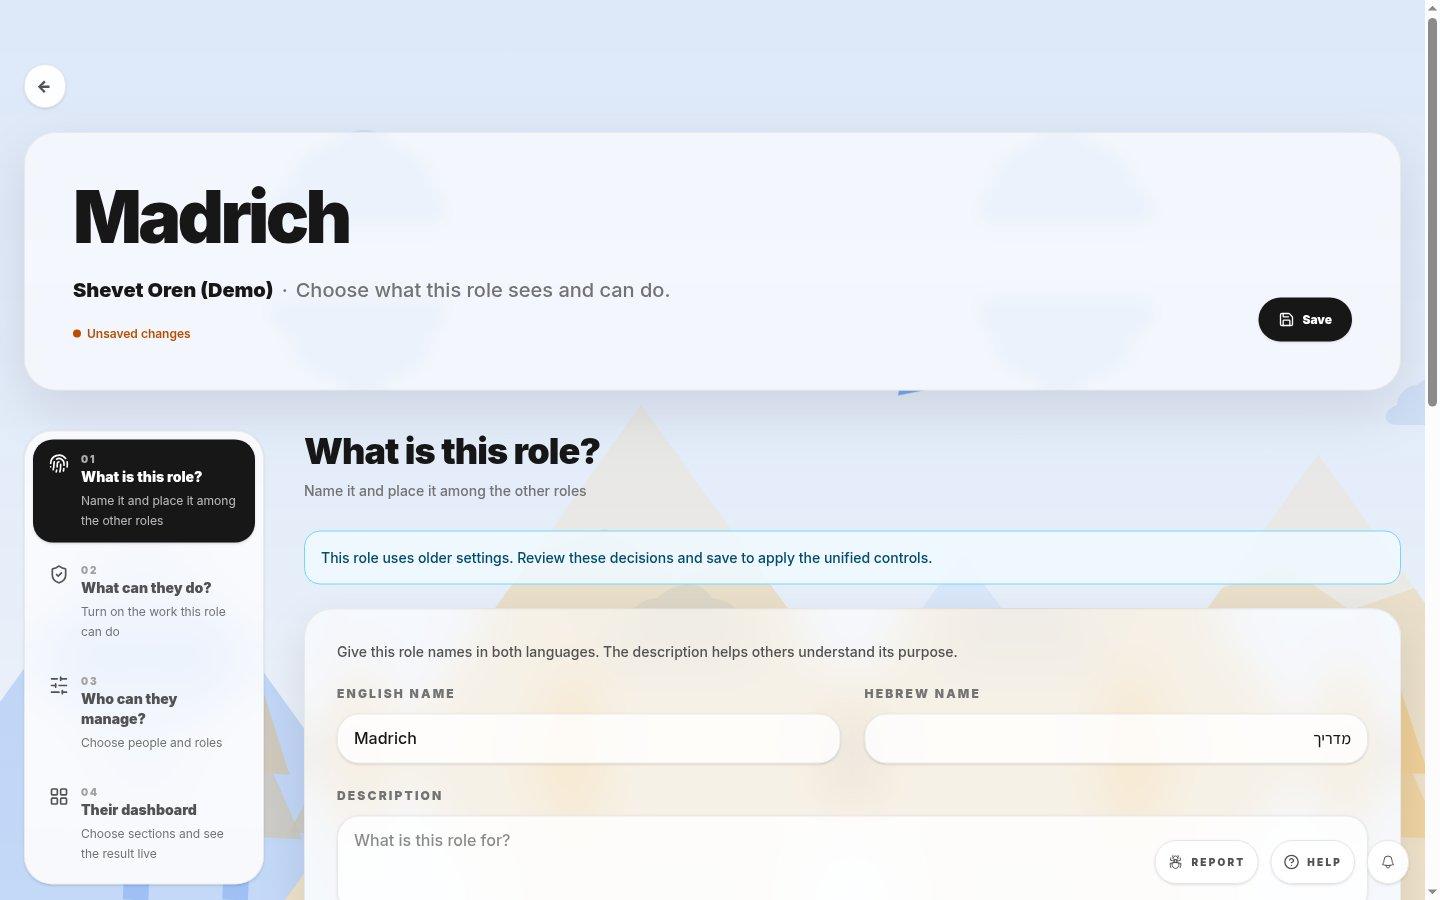
- Role identityUse a recognizable English and Hebrew name and explain the role’s purpose in the description.
- Role editor tabsUse Identity for naming; move to People or Capabilities for permissions.
- 1In Identity, fill in the names and description. In Role order, move only the current role to its intended level.
- 2Save once the hierarchy is correct. Return to the role list to verify the name and check how many members already use it.
If you cannot do this
- Editing requires role-management permission. Locked roles, global templates, and roles in archived shevatim are read-only.
- A role that is still in use or referenced elsewhere may not be deletable; move those references first.
Where to look
Identity and Role order
the Identity tab of a role editor
Save changes
the role editor header