Working together
Manage Shevet Members
Keep members, their roles, and their tzevet assignments accurate from Manage Shevet.
At a glance
- 1Open Manage Shevet and find the Members panel.
- 2Find a member, then open their controls to review their role and assigned tzevet.
- 3Choose only roles you are allowed to assign. A role controls what that person can see and change across Campfire.
- 4Assign the relevant tzevet so the member sees the right Peulot, attendance, and equipment work.
- 5Save the change, then confirm the member appears with the intended role and tzevet.
Step-by-step walkthrough
1.Get to know the shevet Settings page
Manage Shevet opens the shevet Settings page. The top cards are shortcuts; Members shows everyone in the shevet grouped by their tafkid.
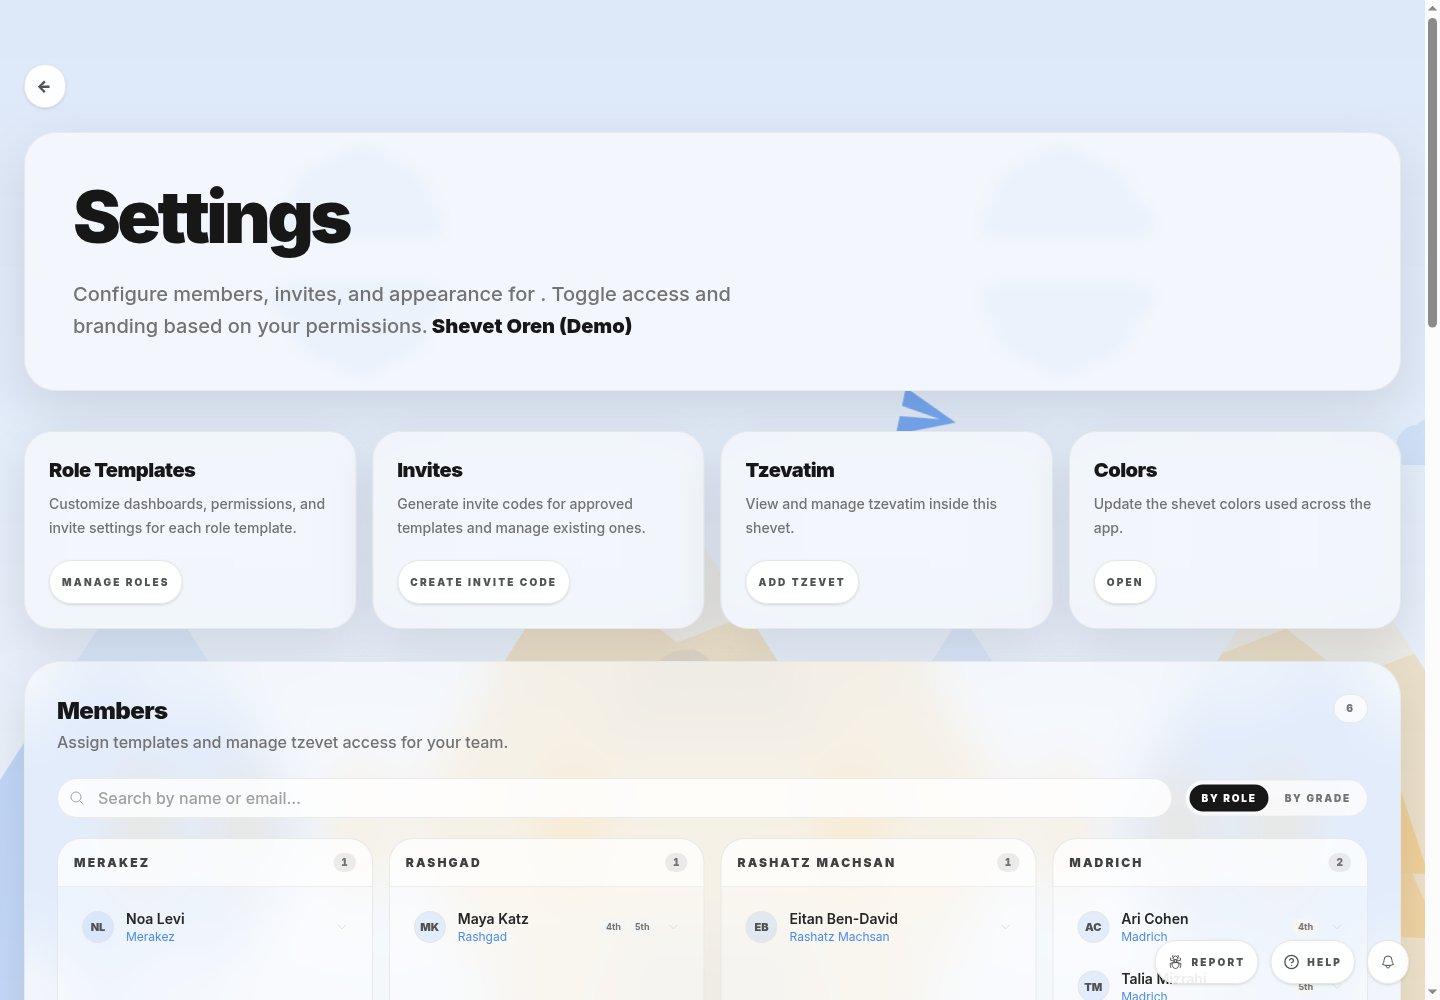
- Shortcut cardsJump to Role Templates (what each tafkid can do), Invites, Tzevatim and Colors.
- Members panelEveryone in the shevet, with how many members there are in total.
- Search membersFind someone by name or email.
- By role and By gradeGroup members by their tafkid or by the tzevet they work with.
- Role columnAll members with one tafkid. Each row shows the person, their tafkid and the tzevatim they are assigned to.
2.Change a member's tafkid or tzevet
- 1Open Manage Shevet from the dashboard action row.
- 2Search for the member, or find them in their role column.
- 3Open the menu at the end of their row to change their tafkid. You can only choose roles you are allowed to assign.
- 4Assign the tzevatim they work with, so they see the right Peulot, attendance and equipment.
- 5Save, then check the member now appears in the expected column with the right tzevatim.
Tip: Switch to By grade to check that every tzevet has the madrichim it needs.
If you cannot do this
- You can only change members and roles that fall within your own management permissions.
- An archived shevet is read-only so its past structure remains intact.
Where to look
Members
the Manage Shevet page