Working together
Invite Someone to Your Shevet
Create an invitation with the right role and tzevet scope, then share its code or link safely.
At a glance
- 1On Manage Shevet, open the Invites section.
- 2Create a new invite and choose the role the person should receive when they join.
- 3If the invite is limited to a tzevet, select the correct tzevet before creating it.
- 4Copy and share the generated invite code or link only with the intended person or group.
- 5Return to the active-invites list to review, revoke, or replace an invite that is no longer appropriate.
Step-by-step walkthrough
1.Get to know the Invites section
Invites are codes that let someone join the shevet with a tafkid you choose in advance. You find them on the shevet Settings page.
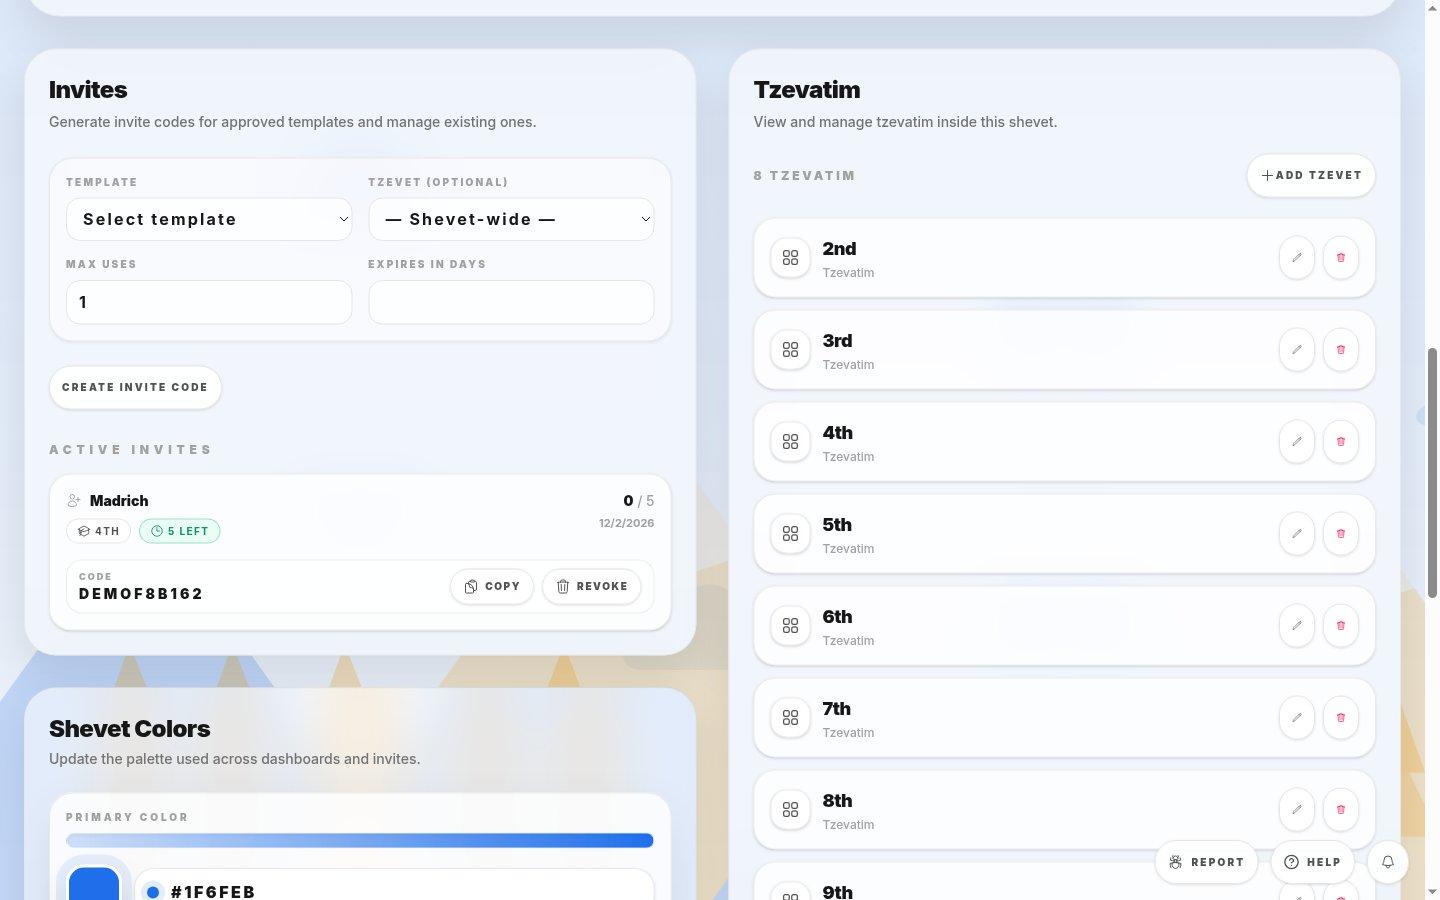
- Invite settingsTemplate is the tafkid the person receives. Tzevet limits the invite to one tzevet (leave it Shevet-wide otherwise). Max uses is how many people can use the code; Expires in days sets when it stops working.
- Create invite codeCreates the code with the settings above.
- Active inviteShows the tafkid, tzevet, uses so far out of the maximum, days left and the code itself.
- Copy and RevokeCopy puts the code on your clipboard to share. Revoke stops the code working immediately.
2.Create and share an invite
- 1Open Manage Shevet and scroll to Invites, or select Create invite code in the Invites shortcut card.
- 2Choose the Template (tafkid) the person should get.
- 3If they should only work with one tzevet, choose it under Tzevet.
- 4Set Max uses (1 for one person) and how many days the code should last.
- 5Select Create invite code, then Copy on the new active invite and send it only to the intended people.
- 6Revoke an invite as soon as it is no longer needed or was shared by mistake.
Tip: Use a short expiry and a low Max uses for roles with management permissions.
If you cannot do this
- Only people with invite permission can create or manage invitations.
- A restricted invite can only grant the role and tzevet scope you selected when creating it.
Where to look
Invites
the Manage Shevet page