Planning a Peula
Create a Maslul
Start a trail in the correct segment and attach it to the intended tzevet or target.
At a glance
- 1On the Maslulim tab, choose New Maslul.
- 2Confirm the selected segment first; it determines the trail's date window.
- 3Choose the intended tzevet or tzevetim, then choose the target the trail is designed for. The title is created from those choices.
- 4Review the dates and create it.
- 5Return to the segment board to confirm the new trail card appears in the expected segment.
Step-by-step walkthrough
1.Place the new trail in the right segment
A trail spans a defined part of the year. Choose its segment and learners before adding activities; these choices determine where it appears.
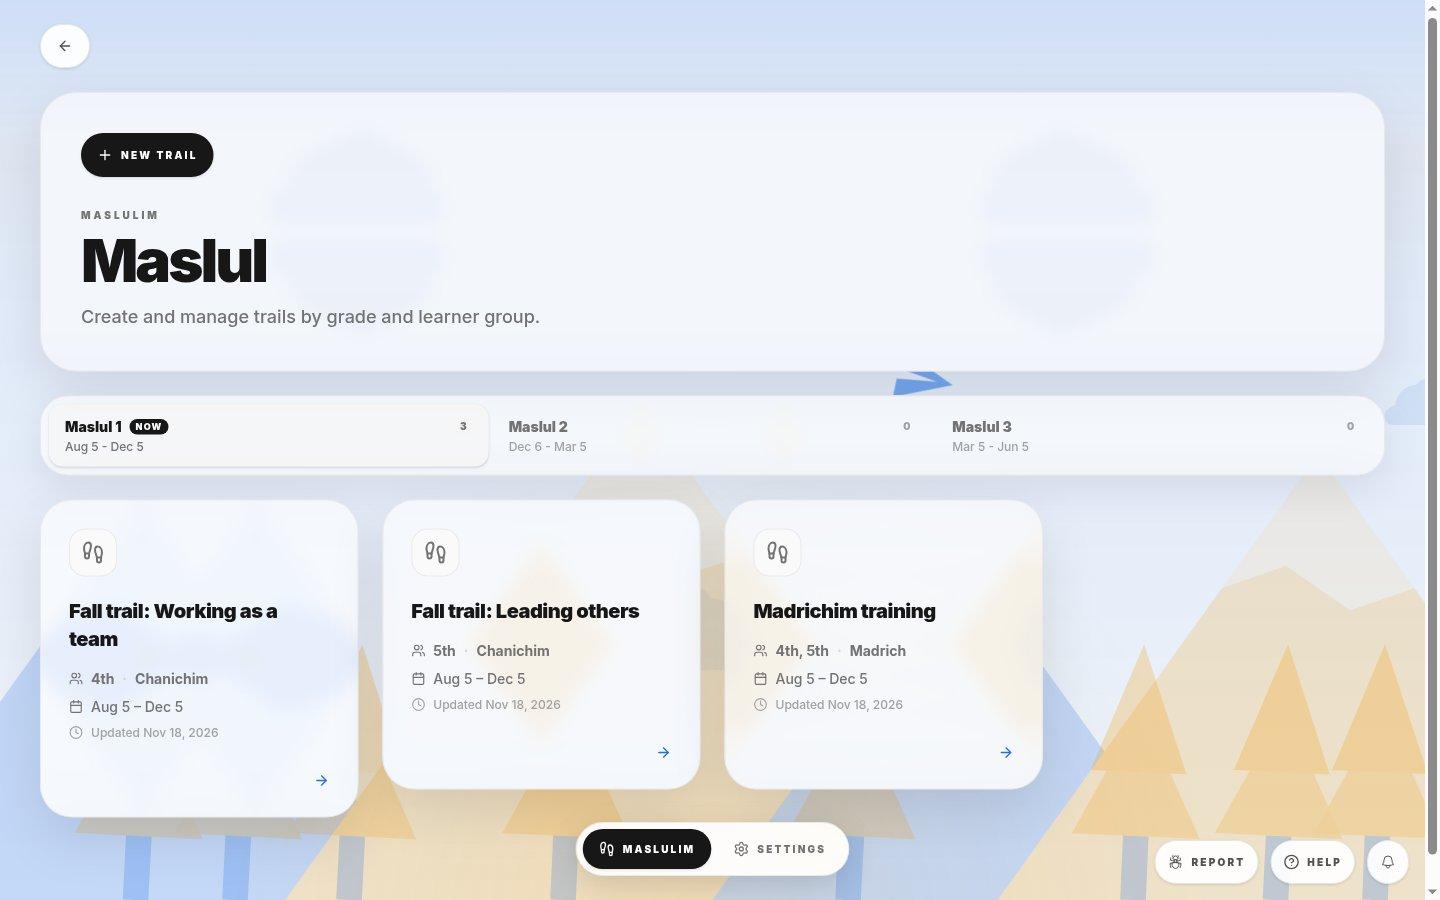
- New TrailOpens the creation form.
- SegmentCheck its range first so the activities fall in the right part of the year.
- 1Choose the segment for the plan, then select New Trail and verify that the form uses that segment.
- 2Select the tzevatim and tell Campfire who the plan is for: chanichim or a tafkid. Review the generated title.
- 3Create the trail, find its card in the chosen segment, and open it to add the first goal.
If you cannot do this
- Only available tzevatim and targets appear in the form, based on your Maslul access.
- Choose the segment deliberately; changing dates belongs in Maslul Settings.
Where to look
New Maslul
the Maslul page header