Planning a Peula
Configure Maslul Segment Dates
Set the three chronological Maslul windows that organize trails across the academic year.
At a glance
- 1Open Maslul and choose Settings from the bottom tab bar.
- 2Review each segment's start and end boundary in chronological order.
- 3Change a month or day carefully. The page keeps neighbouring boundaries in order so segments do not overlap.
- 4Save when the dates match the shevet's academic-year plan.
- 5If you try to leave with unsaved changes, either save them or choose to discard them deliberately.
Step-by-step walkthrough
1.Check the whole year before saving segment dates
These settings define the shared date windows. They are not the dates of individual activities.
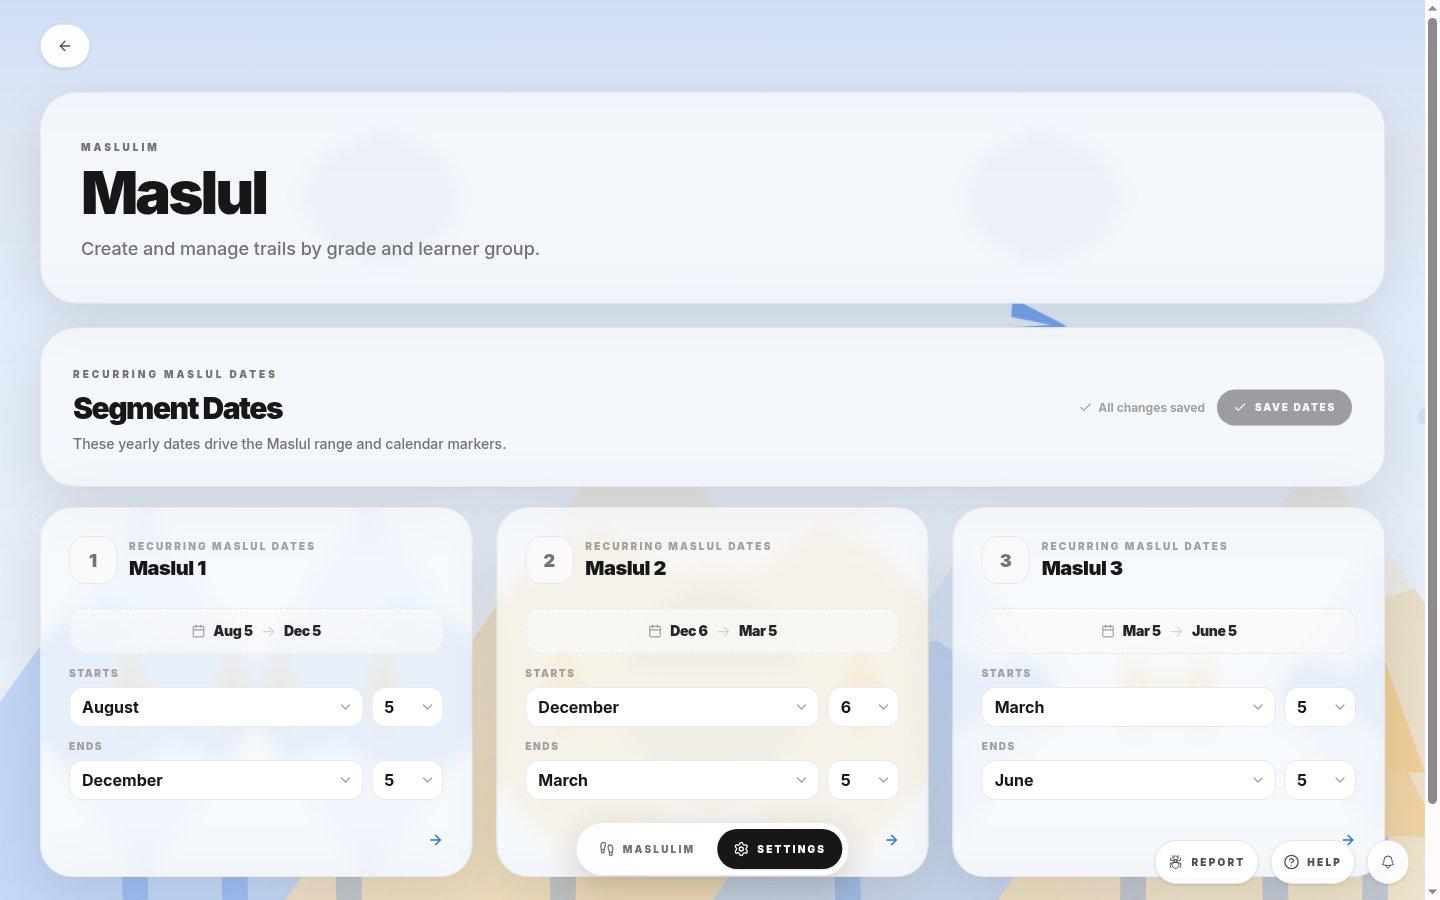
- Segment datesEdit month and day for the start and end of the window. Check neighboring dates after changing a boundary.
- SaveApplies the new date configuration for the shevet.
- 1Open Maslul, then Settings in the bottom bar. Compare all three windows to the shevet’s year plan.
- 2Change the intended start or end. Recheck the next segment so the windows stay in order without overlap.
- 3Save and return to Maslulim to verify the labels now show the expected ranges.
If you cannot do this
- Settings appear only to people with permission to manage Maslul dates.
- Date changes reorganize the windows used by all Maslulim, so coordinate them before saving.
Where to look
Settings
the Maslul page bottom tabs