Getting started
Open a shevet workspace
Choose the right active shevet and enter its Campfire dashboard.
At a glance
- 1On the main dashboard, find the shevet under Active Workspaces.
- 2Check the year and tafkid badge on the card to make sure it is the right workspace.
- 3Select the card to open that shevet's dashboard.
- 4If the shevet is not listed, join it with an invite code or ask a shevet manager for access.
Step-by-step walkthrough
1.Choose the workspace you need
Your Shevatim is the workspace picker. Every shevet has its own calendar, plans, and permissions.
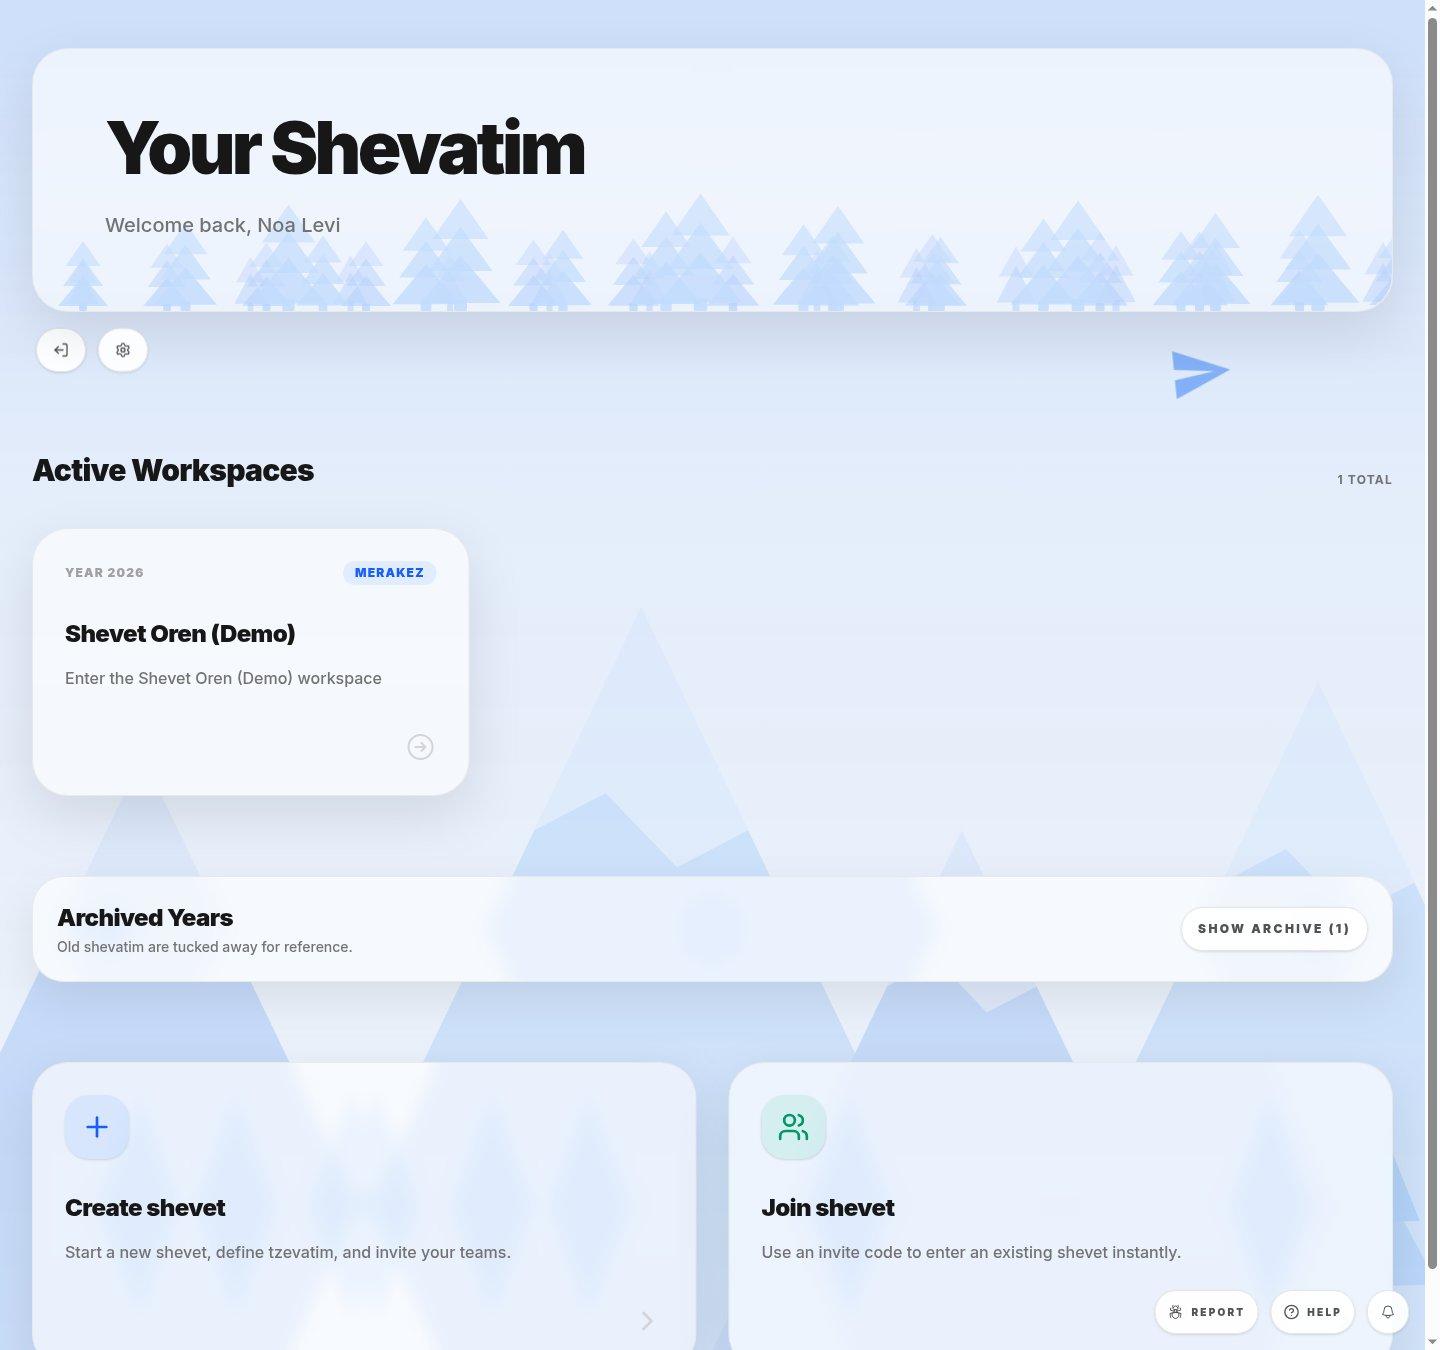
- Active workspaceThe year and tafkid on the card tell you which workspace you are about to enter.
- Past yearsUse the archive for a past year, not for planning this year’s activities.
- 1Find the shevet under Active Workspaces and confirm the year and your tafkid on its card.
- 2Select the card. Check the shevet name on the dashboard before you create or change anything.
- 3To switch shevatim, choose All Shevatim at the top of the dashboard and open the other card.
Tip: If the shevet is missing, ask its manager for an invitation; signing in alone does not join it.
If you cannot do this
- You are not a member of that shevet yet.
- The shevet may be in Archived Years instead of Active Workspaces.
Where to look
shevet card
the Active Workspaces section of the main dashboard