Planning a Peula
Restore or Permanently Delete a Peula
The Trash tab is the recovery step after removing a Peula from your library.
At a glance
- 1Delete a Peula from a collection only when you no longer want it in the active library; it moves to Trash first.
- 2Open the Trash tab to review removed Peulot.
- 3Use Restore when you want the Peula back in your personal collection.
- 4Use permanent delete only after checking that the Peula and its history are no longer needed.
Step-by-step walkthrough
1.Recover the right Peula from Trash
Moving a Peula to Trash hides it from active collections. Restore and permanent deletion have very different effects.
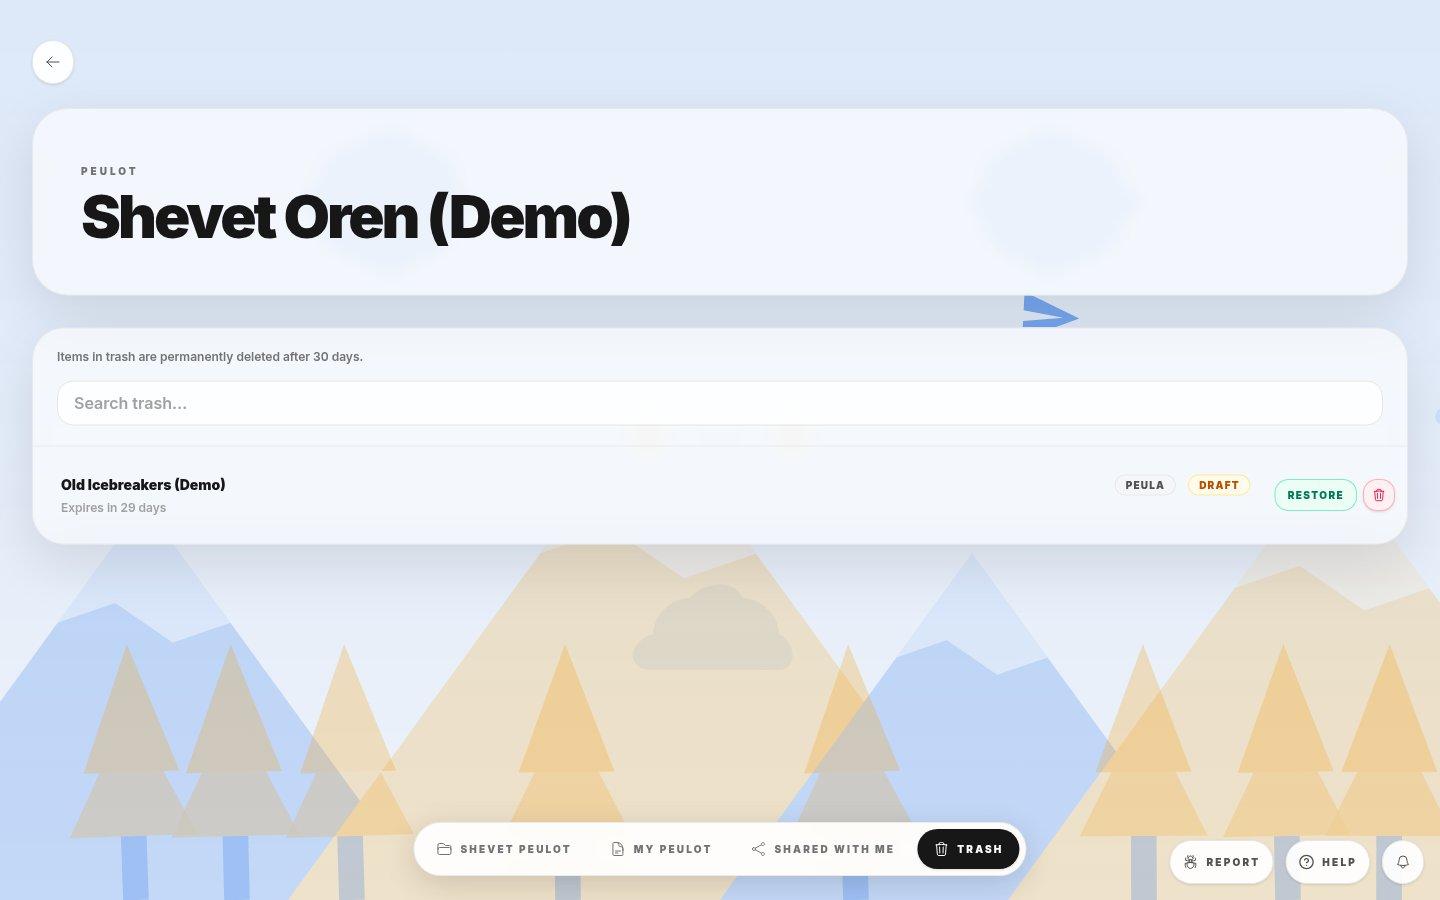
- TrashShows removed Peulot you can manage in the current workspace.
- RestoreMoves the plan back to its active collection.
- Permanent deletionOnly use this if you no longer need the plan or its history.
- 1Open the Peulot library and choose Trash. Check the plan title and shevet.
- 2Select Restore and confirm the plan appears again in the appropriate active collection.
- 3If removing it forever, read the confirmation before selecting the permanent-delete action. Do not confirm when unsure.
If you cannot do this
- You can only delete a Peula when you have permission for that specific plan.
- Permanent deletion cannot be undone.
Where to look
Trash
the bottom tabs beside Shevet Peulot